 EN
EN

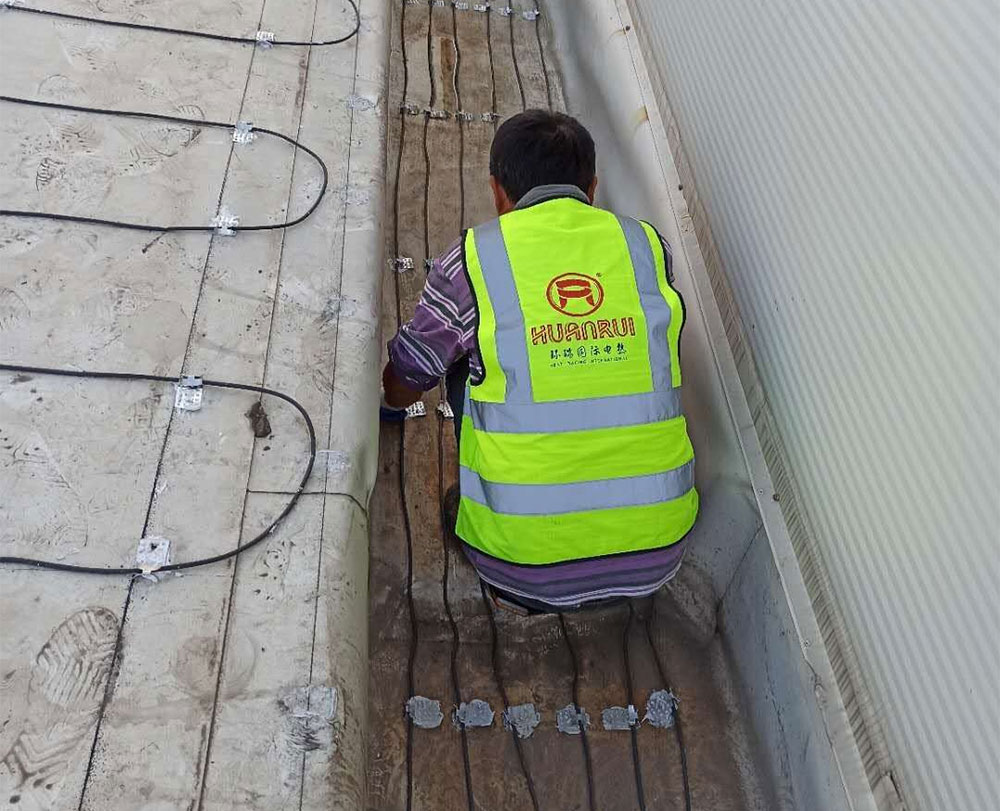
Roof heating cables, also referred to as roof de-icing cables and gutter heat tracing cables, are core electric heat-tracing products for winter roof snow melting and ice prevention. They are widely applied to metal roofs, asphalt shingle roofs, gutters and downspouts for anti-icing projects. Proper installation of roof heating cables can effectively stop ice dams and snow accumulation, prevent downspout freezing, and avoid roof leakage and gutter deformation to keep the roof drainage system working reliably. This article systematically introduces roof heating cable types, pre-installation preparation, standard laying techniques, installation differences for various roof materials, safety construction guidelines, control system selection, post-installation acceptance tests, annual maintenance plans and common troubleshooting, enabling installers to master the full compliant installation procedure for roof heating cables.
1. What are roof heating cables and what are they used for?
Roof heating cables, also known as roof de-icing heat tapes, are professional electric heat tracing products designed for roof eaves, roof valleys, gutters and downspouts. They create continuous melting drainage paths in cold winter, effectively preventing ice dams, snow accumulation, pipeline freezing, roof leakage, gutter deformation and exterior wall water damage. They are widely used on asphalt shingle roofs, metal roofs, residential buildings, villas and industrial plants.
2. What are the types and differences of roof heating cables?
There are two mainstream types: self-regulating roof heating cables and constant-wattage roof heating cables. Self-regulating cables automatically adjust heat output according to ambient temperature, delivering more heat in cold areas and less heat in warm areas. They allow overlapping installation, prevent overheating, save energy and require no manual adjustment, making them the first choice for most residential and commercial projects. Constant-wattage cables provide stable and consistent heat along the whole length with cost-effective performance. They are suitable for regular roof areas with stable low temperatures, but require strict installation spacing and overlapping prohibition.
3. What preparations are needed before installation?
Complete full pre-installation preparation to ensure stable performance and long service life. Thoroughly clean leaves, sediment and debris from gutters, downspouts and roof edges to guarantee smooth drainage. Inspect and repair loose, cracked or missing shingles, leaking gutter joints and rotten fascia boards. Accurately measure the length of roof eaves, valleys, gutters and downspouts, reserving enough margin for bending and routing. Prepare original manufacturer clips, suspension brackets, sealing kits, waterproof junction boxes and safety tools. Ensure dry construction conditions and confirm a standard GFCI protected power outlet before construction.
4. What is the standard installation layout for roof heating cables?
Adopt a standard zigzag V-shape layout on roof eaves, the most effective method to prevent ice dams. Adjust the vertical laying height according to the overhang width to cover the thermal boundary of the roof. Lay cables straight along the center of roof valleys with loop structures at the top to eliminate freezing dead zones. Install cables throughout the gutters with special suspension clips to avoid full contact with the gutter bottom, ensuring unobstructed water flow. Apply up-and-down loop installation inside downspouts to form double heating protection and completely prevent pipe blockage.
5. What is the installation difference between metal roofs and shingle roofs?
Asphalt shingle roofs use special shingle clips fixed under the shingle edges without penetrating the waterproof layer, avoiding leakage risks. Metal roofs strictly forbid drilling or penetrating the metal panels. Use non-penetrating clamps and high-strength adhesive to fix cables completely, protecting the anti-corrosion layer and structural integrity of metal roofs. Keep uniform clip spacing, flat cable layout and avoid sharp bends and overlapping accumulation on all roof types.
6. What are the core safety installation rules?
All construction must be performed under power-off status with power confirmation tests. Never use nails or ordinary staples to pierce the cable jacket, which will cause insulation damage, electric leakage and short circuits. All termination, splicing and sealing work must adopt original waterproof kits for moisture and water resistance. The whole system must connect to a dedicated GFCI protected circuit with weatherproof outdoor electrical accessories. High-altitude roof work requires complete safety protection equipment; construction is forbidden in windy, rainy and wet weather. All electrical connection work must be completed by licensed electricians to meet code requirements and maintain product warranty validity.
7. How to match control systems for roof heating cables?
Three mainstream control modes are available. Manual control is suitable for small simple roofs with manual seasonal operation. Timing control sets fixed working periods to target low-temperature nights and improve energy efficiency. Intelligent temperature and humidity dual control is the optimal solution. The system only activates under cold and humid freezing conditions and automatically stops in warm and dry weather, realizing fully automatic unattended operation and maximum energy saving.
8. What tests and acceptance are required after installation?
Complete dual inspection and testing after installation. Visual inspection confirms flat cable layout, firm fixation, intact jacket, standard routing and complete waterproof sealing. Power-on performance test runs the system for 15 to 20 minutes to check uniform heating without hot spots or cold spots. Test GFCI protection and controller sensitivity to ensure accurate automatic operation. Keep complete test records after qualified acceptance before winter operation.
9. How to maintain and inspect roof heating cables regularly?
Perform comprehensive inspection before every winter season. Clean roof and gutter debris, check cable jacket wear, aging and damage, verify clip firmness and sealing integrity. Visually inspect system operation after snow and rain to ensure no freezing blockage and abnormal tripping. Clean cable surface and keep dry storage in spring to avoid long-term sun exposure and water soaking. Regular maintenance effectively extends cable service life and ensures stable de-icing performance every winter.
10. Common installation faults and solutions
System fails to start: Check power circuit, GFCI breaker and sensor shielding or loose connection. Partial no heating: Repair bent, squeezed or loose cables and fix poor contact points. Frequent tripping: Immediately power off and inspect insulation damage, water ingress and failed sealing, then redo waterproof and insulation treatment. Poor de-icing effect: Adjust cable laying height and spacing, clean blocked gutters and calibrate controller parameters.
Table of Contents
- 1. What are roof heating cables and what are they used for?
- 2. What are the types and differences of roof heating cables?
- 3. What preparations are needed before installation?
- 4. What is the standard installation layout for roof heating cables?
- 5. What is the installation difference between metal roofs and shingle roofs?
- 6. What are the core safety installation rules?
- 7. How to match control systems for roof heating cables?
- 8. What tests and acceptance are required after installation?
- 9. How to maintain and inspect roof heating cables regularly?
- 10. Common installation faults and solutions